

As I get better at photography, and share more of my photos, many people ask me what camera I use. Many photographers take this as an insult, as in “You don’t ask a good cook what oven he uses” or “You don’t ask a good pianist what kind of piano she uses…” Personally I take it as a compliment!
So I’ve decided to make a single blog post where I list all my photography gear. The above photo includes all the gear and bags I use regularly, but instead of the rest of the blog post being a boring list, I’ve decided to give it a different spin. I’m going to list my gear by how important it has been to me in the pursuit of improving as a photographer.
Why? If you are new photography, buying an expensive camera isn’t going to help. Instead you need the smaller things that most lists like this push to the end or neglect entirely.
And if you are already a pro-level photographer, and know all about gear, my choice of camera body is hardly unique. The more subtle things will explain my photography mindset far more clearly.

The most important piece of gear is the strap on my camera. It cost €12, if I remember correctly. It goes around my wrist. When I’m out and about with my camera, or at a show, or any event, my camera is in my hand.
To get better at photography, you have to take lots and lots of photographs. That’s the only way to improve! It’s not that if you hold down the shutter on burst mode one of the shots will come out great. Think about it this way: Every photo you take is a small lesson in how to do something right or do something wrong.
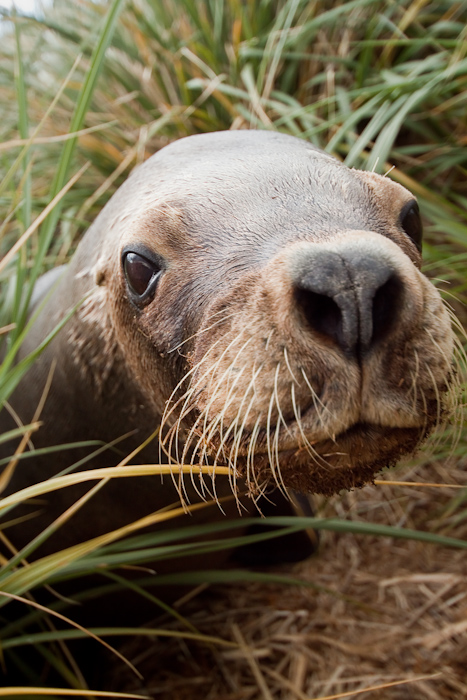
So if the camera is in a bag, you won’t take photos. If it is on a strap around your neck, you might pick it up in time, and get a snap, but maybe not. If the camera is in your hand, you can’t forget you have your camera with you! This wrist strap means my camera is unencumbered, and I can easily slip it off my wrist if I need to, but only if I want to. If a strap is around your neck, you can’t easily swing the camera into the right position to get fun images like this one:

My next piece of gear is software. You should buy Lightroom or Aperture before you buy a new camera or a new lens. This is obvious to anyone who has already downloaded either application.
Why?
First, if you are taking lots of photos, and remember, that is the only way to improve, it’s a real pain to sort through them manually. Spend the money on either Lightroom or Aperture, as they make sorting through even thousands of photos a complete breeze. Even if you disregard all the editing features, having an easy way to sort, select, export and archive your photos means you will be happy to take more and more.
Second, you learn a million things about photography by fiddling with the settings in Lightroom or Aperture that are impossible to explain just by pointing at the settings on a camera body.
Third, by using the editing tools you get better results than the raw images from the camera. Obviously. I take many photos knowing I’ll do an edit in Lightroom. Nothing drastic, but I know I can rely on adjusting some parts of the image later.

I have two camera bags that I use regularly, but they are only for transporting my gear between home and wherever I’m heading in the world. I love my Lowepro Slingshot for airline travel (works as a “personal item” on every airline), but these days I rarely take it with me when actually photographing. Instead I use a lens case. Sometimes two. These I can throw in my lightweight day bag, or if I know I’ll be swapping lenses often over a short period of time, I’ll attach one to my belt.
Why? Well, one of the most annoying things ever is to not have the right lens on the camera when you need it. Sure, you can use two camera bodies, but that’s overkill for the vast majority of us. I can switch lenses super quickly, doing a little routine to make sure I’m not going to drop anything, and swapping lens caps.
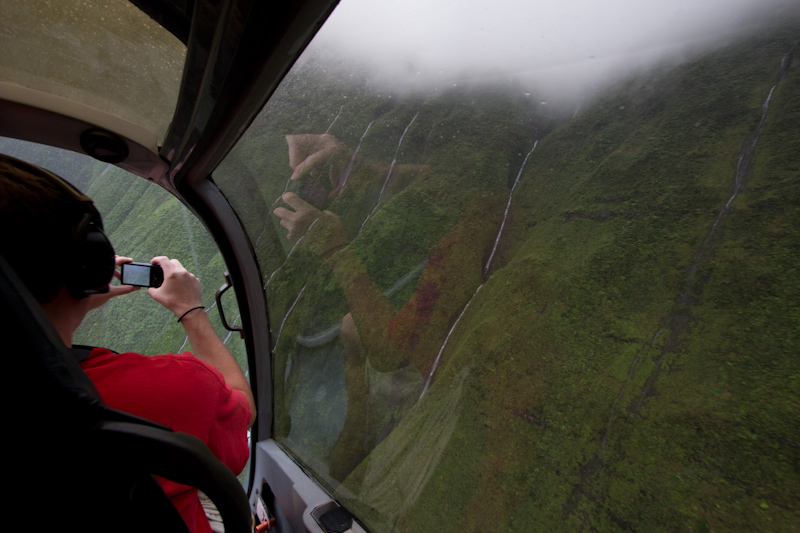
They weigh next to nothing. Also when I took a helicopter trip in Hawaii we weren’t allowed bags of any sort. But a case attached to my belt? Technically not a bag! With a lens case on my belt I look like a dork, but a dork who is taking lots more photos, and a dork who isn’t going to be in any of those photos, as the camera is pointing away from that dork.

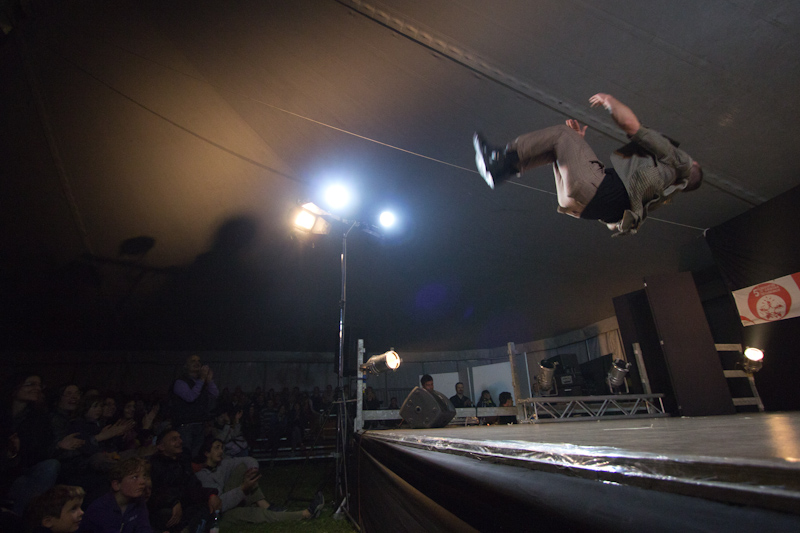
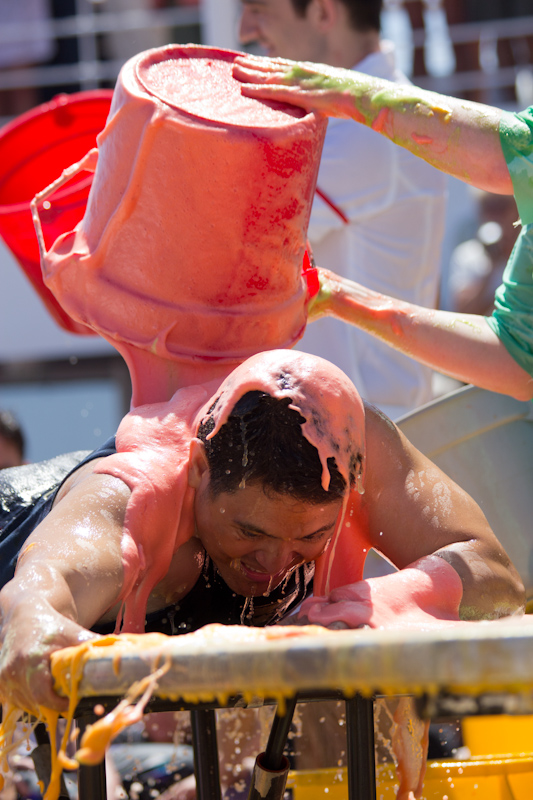
This is a negative gear pick. It might sound like sacrilege, but I don’t bother with the rear lens caps if I’m swapping lenses often over a short period of time. If the environment is full of sand or volcanic ash (and this can be the case when I travel), of course I’ll make sure my lenses are sealed, and if I’m not going to use the lens again for more than five minutes. But if I’m taking photos of a juggling show? The most important part is getting the “capture”. If I’m fiddling with a rear lens cap, the chances are I’ll miss a lot. For example, I know for a fact that my telephoto lens was sitting in the lens case on my belt with no rear lens cap when I took the following photo, and Wes wasn’t about to do this a second time:
Two of my lenses are suitable for full sized sensors, and two are for cropped frame cameras. If this means nothing to you, don’t worry. Needless to say, I make sure all these caps fit on both kinds of lenses, as there is nothing more annoying than trying to fit something that doesn’t fit onto something else when you’re in a hurry.
Removing and replacing front lens caps is now such a honed action that it doesn’t slow me down at all.

Holy shit, how awesome is the GorillaPod? I used one for almost every single non-hand-held clip in my International Juggler video series. I’ve used three different sizes over the years, with different video and photo cameras, and now I’ve settled on one that is slightly too weak for my DSLR with a long lens attached, but I don’t mind that due to the weight and space savings.
There are many shots that I’ve not managed to get because I didn’t have a full size tripod with me, but an order of magnitude more photos because the Gorillapod was small and light enough to put in my pocket. It’s even light enough to leave on the bottom of my camera, while carrying my camera in my hand for a full day, and not get in my way.
I have a Manfrotto tripod, but it never leaves my home studio where I use it for video projects.

To take long exposure photos with a Gorillapod, you need to leave the camera steady when activating the shutter. I sometimes use the cable remote, sometimes use the IR remote. For self portraits, the IR remote is the only way to go, and you might as well not bother with self portrait photography until you buy one.
GorillaPod plus cable remote means you can get shots like this, and don’t have to carry a heavy tripod up the side of Yosemite Valley:


Have too much storage than you think you might need. Seriously, if you’re worried about filling up your SD cards, you’ll take fewer photos, and one of the photos you didn’t take might be one that taught you a very important lesson. I have another 4GB card, but that was in the camera I used to take the above photo.

And if you take lots of photos, storage is cheap enough these days that you can throw away nothing. Not deleting images is a blog post all of its own, but I think having lots of hard drives makes you a better photographer.

My favourite lens is the Canon EF-S 10-22mm f/3.5-4.5. It is awesome. It’s designed for crop sensor cameras only, but that suits me fine.
Why do I like it so much? Because it’s light! I can carry this around all day, and not worry about my arm getting tired. Why else do I like it? Because it’s awesome value for money. The image quality is amazing for a lens that only cost me €600. Previously I had a cheap Tamron version, which was shit, and broke under heavy usage in under a year, but that model will probably do if you are experimenting with wide angle photography.
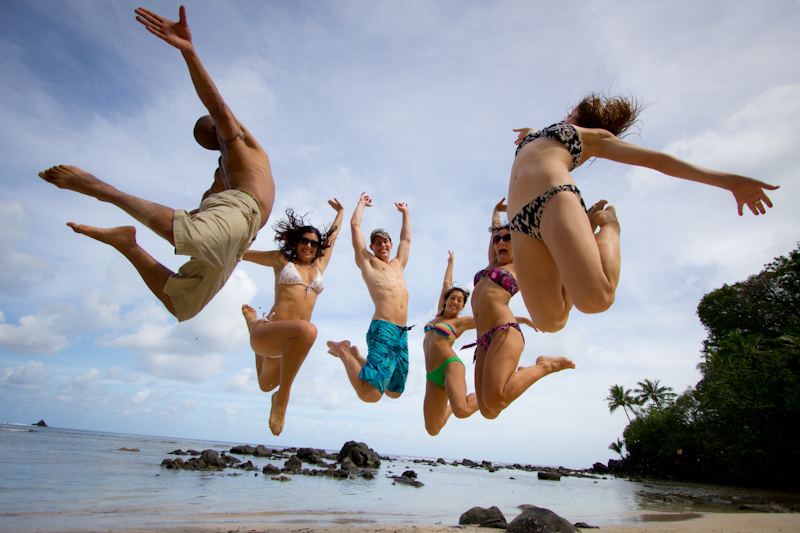
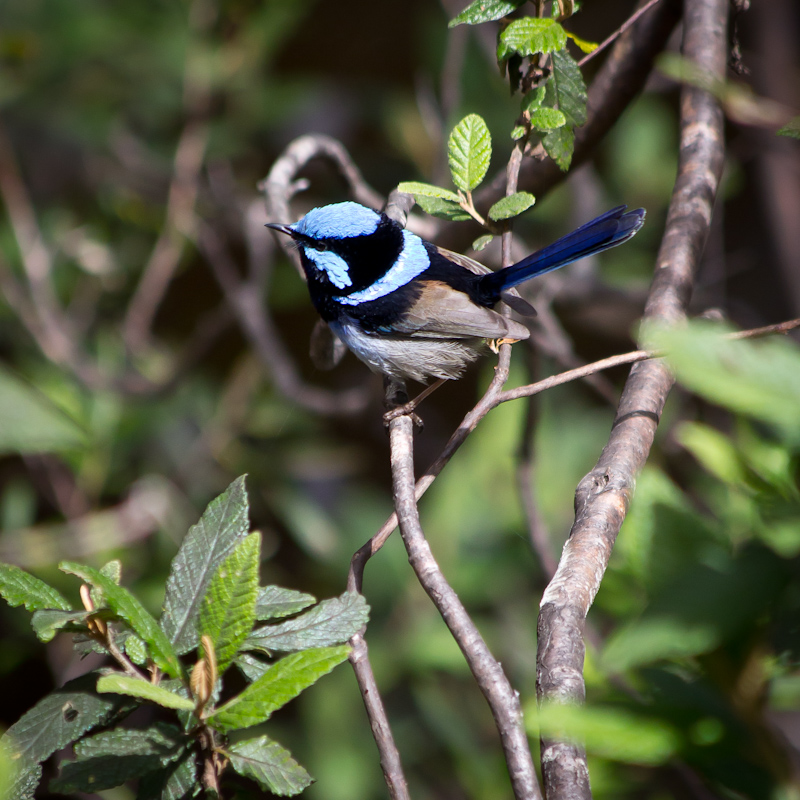
This isn’t the place to get into why I love a wide angle lens as my go-to walk-about lens, but once you get the hang of it, it makes for very distinctive images. With the Gorillapod and a cable remote it’s a really fun setup for landscape and nature photography. And during events you can’t get too close to any subject, or fail to get everyone in a large group in the frame.

The other lens I always carry with me is my telephoto zoom. It’s a Canon EF 70-300mm f/4-5.6 IS. For a start, it’s a good “budget” lens for getting in close without getting close. It only cost €500. Previously I had a cheap Tamron version, which was shit, and broke under heavy usage in under a year, but that model will probably do if you are experimenting with a telephoto zoom.
I use this for portraits, for candid photography at event (when you don’t want to get in someone’s face), for wildlife and bird photography, and almost any time I’m snapping a juggler on stage.
It’s the heaviest lens I use, which is a pity, but in this case there is just no way to compromise further in weight savings. I’d love a better telephoto zoom, and could easily afford one, to be honest. But it’s not just weight in this case. The way I treat my lenses isn’t with the greatest of care, to say the least, and I don’t mind if this lens only lasts me two years before I inevitably throw it out of a taxi by accident (a story for another blog post).
The “IS” stands for Image Stabilization. This adds an extra f-stop of low light capability to the specs. Kinda.

The camera body I use is a Canon 60D. I love it! I’m not going to go into a feature list here, as you can check out many other exhaustive reviews.
I had two versions of the Rebel-level Canon DSLR cameras, a 400D and a 500D, which are the perfect cameras when starting out. If you don’t know why you need a better camera than the current Canon Rebel (or equivalent Nikon or Sony), then you don’t need a better camera like a 60D or a 7D or a 5D mark II.
When the 7D came out, I thought about buying one. Until I picked it up. The 7D has a magnesium chassis, and was waaaay heavier than the Rebel-sized camera I was used to. A year later the 60D was announced. It had all of the features I liked in the 7D, but had a fully plastic body, which saved just over 100g.
The one feature which made me order this camera from amazon the moment it was available was the fully articulated LCD screen. I never use this for when taking photographs, but for videography it is indispensable. I video myself juggling a lot, and without the articulated screen it always took me three attempts of running backwards and forwards, testing the shot, making sure I was in the right place, etc. Now I just set the shot up as close as possible, flip the screen, and walk out to the exact right spot. Sweet.
My long considered “hey, the 60D is awesome” blog post will have to wait. I still have my Canon 500D, but it’s held together by electrical tape after accidentally throwing it out the door of a taxi. I use it as a spare body sometimes, but as it is very broken it’s hardly worth trying to sell, and as a gift it would only be a burden.

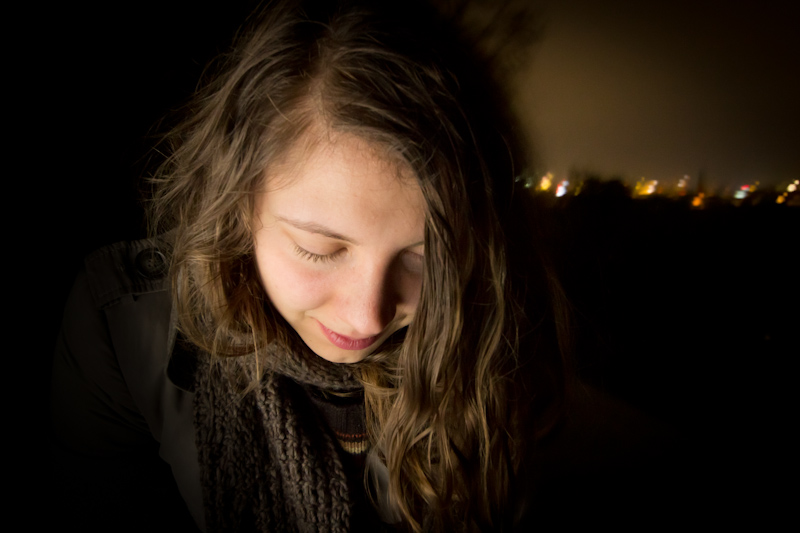
Before you buy the above lenses, buy the Canon EF 50mm f/1.8. I don’t use it much anymore, but should probably go above the other lenses in this list if you are just starting out with DSLR photography. It’s a perfect learner lens, and everyone should use one to really understand what photography is really all about. Needless to say, if you are already a pro-level photographer, you most likely already own the 1.4 and/or the 1.2 version.
If you don’t already know, it’s good for portraits and shallow depth of field:


The Canon EF-S 18-55mm f/3.5-5.6 IS came as the kit lens with my 500D. I use it only for video projects, never for photography, but I’m always getting video of me juggling around the world, so it is a constant companion. My 70-300 is almost always too tight to capture a video of me juggling, though it sometimes works, and the 10-22 is sometimes too wide. The 18-55 fills the gap in focal length.
That is it for my lenses!
Sharp eyed readers will be wondering “Hey Luke, if you don’t use the 18-55 for photography, what lens do you use if the 10-22 is too wide or the 70-300 is too narrow?”
The truth is that I just don’t bother. I like my photography to look different to what I can see with my eye. The reason 35mm is such a standard is that it captures what the human eye sees, or near enough, and that is why the kit lens always covers the focal lengths around that number.
I love the 10-22 because it lets me capture a wider angle than a human can, including many more details than you can get in the blink of an eye. And I love the 70-300 because it can capture any one of those details in more detail than you can with a human eye.
The 22 end of the 10-22 lens, on a crop sensor camera, is close enough to a true 35mm to me, or as close as I care for. Every time I use the 18-55 lens for regular photography, I just don’t know what to do with it! I feel totally uninspired, and when I see the results on my laptop, they look insipid. This is my failing as a photographer, I know, but I don’t take photos for anyone else. I take photos to have fun, and the more fun I have, the more other people are happy with my photos. I just don’t have fun with the 22-70mm range that is the basis of a majority of the photographic output of the majority of photographers.
If I need to capture more, I step back. If I want to capture less, I step forward. It’s more handy than changing lenses anyway, and gives my photography a distinctive look.
The telephoto lets me focus on the person having the experience, the wide angle lets me focus on the people around the experience.
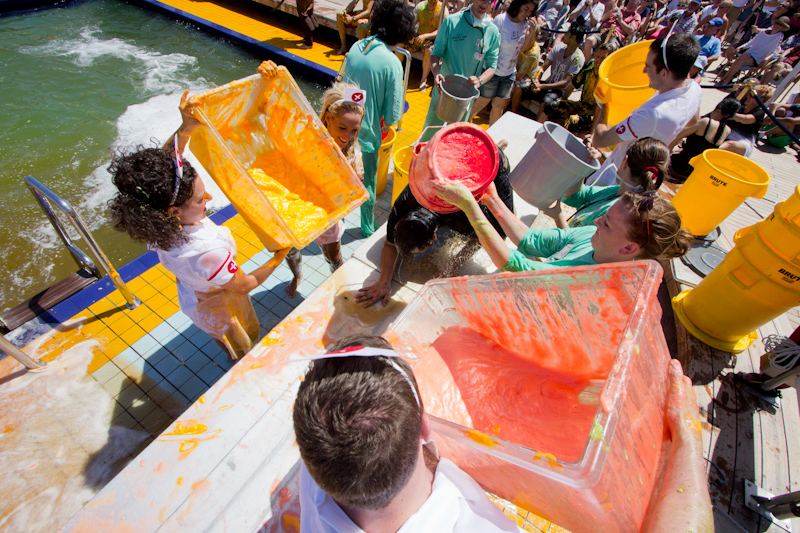
If you’re unsure how well I can cover an event with just two lenses at the extremes of the focal length range, check out my previous blog post about the King Neptune Ceremony. The event lasted maybe 25 minutes, I took 166 photos and thought 70 were worth sharing. 70 out of 166 is a pretty good success rate, I think. As you scroll through you can see I swapped between my two lenses. I got loads of great reactions to these photos (a common on being “Your photos are way better than the professional photographers’ shots!” but that says more about the skill of cruise ship photographers than my own) but none of the comments were anything like “Hey, why were all of your photos either telephoto or wide angle shots, and nothing in between?”
Other equipment:

Whenever I’m anywhere interesting I geotag all of my photographs. I do this with an Amod AGL3080 GPS data logger. I attach this to my bag and it blinks every 5 seconds as it records my current location. Later I use HoudahGeo to put the gps coordinates for every photo into the metadata. I’ve yet to find a use for this data in regards to sharing it easily with other people, but it’s nice to keep track of what I took where. Some places I’ll remember where I took the photo, but street maps aren’t that handy when sailing in Antarctica, or hiking in jungle in the Amazon, or visiting other extreme locations.


My camera bags are mostly used for transporting my gear. When I’m actively taking photos, I don’t use them much (see my points above). I’ll take this slightly out of order so it makes sense.
The Lowepro Slingshot 102 (or similar) is the perfect size for holding my 60D, 10-22mm, 70-300mm, 18-55mm, 50mm, a small Gorillapod, memory cards, cable and IR remotes, Amod GPS tracker, battery charger, and 5 juggling beanbags. I always want to have the beanbags with me in case I need to get a video of me juggling while traveling. It’s a tight fit, but I like to have it all in one bag which never leaves my sight.
Also the “slingshot-ness” of the bag is good for swinging it around the body to change lenses quickly and easily.

In fact, I love the slingshot action so much that I modified my other camera bag’s straps to enable me to do the same thing. It’s a bit tricky to explain in text, so maybe I’ll make a video of the modification some day. The Cullmann Lima is a pretty sturdy backpack which is big enough to hold all my photography gear, plus my 15 inch Macbook Pro, plus has space to spare.
When I went to Oregon and California this autumn, I took only this bag, and it held everything I needed for a two week trip. My camera gear, and my laptop, and my clothes and other travel stuff. It even survived a bear attack in Yosemite National Park. I’m planning to do many more trips with so little gear in the future, including an East Africa safari trip, and it’s a joy to travel without my juggling show gear.

So when I’m not transporting gear, I just use a cheap and light day bag. This folds totally flat and fits in my other travel cases.
An even cheaper and lighter option is the drawstring bag. This rolls up and fits in a pocket!
As they take up so little space and weight, they are way more practical for day trips out and about than a camera bag. If you pad the lenses inside the bag, there’s no need to have the entire bag padded, like the camera bags above. Why have a protected pocket for memory cards or a padded compartment for your water bottle? Just chuck that stuff in the lightest bag possible. It saves on weight and bulk.

I have Canon Speedlite 580EX II Flash which is totally awesome, but I rarely travel with it, meaning that it sits unused for the majority of my photography, due to its own weight, and the weight of all the other accessories needed to use it effectively. I like using it for projects at home, or in Berlin, and plan to use it more in the future.


To go with the strobe I have various other equipment, like the FlashZebra Off Camera ETTL Cord for Canon — 7.5 Meter. And the Honl Speed Strap for attaching filters. And a set of Honl filters and gels. I have an old umbrella too, and some old stands, and some adaptors to fit it all together.
I’m listing this last because so far it hasn’t helped me become a better photographer. In fact it has kinda got in the way of me being a better photographer. It’s like a distraction. When I need it for a photo, this gear lets me get a better result for that photo, but as I don’t have it with me like the gear above, it’s not a constant help.

And I have a Flip camcorder. It comes in handy for when I want a 2 hour long video, rather than a 12 minute video (all a DSLR can manage). I’m thinking of getting a GoPro HD, but it’s hard to justify paying more for something I wouldn’t use that much.
So that’s all I want to share! Leave comments if you want, or email luke@juggler.net.